The Ultimate Guide to Makeup Foundation: How to Choose, Match, and Apply Like a Pro
Finding the perfect makeup foundation often feels like looking for a needle in a haystack. With hundreds of shades, dozens of formulas, and an overwhelming array of finishes lined up on store shelves, it is easy to end up with a bottle that looks like a mask, oxidizes into an unnatural orange hue by noon, or settles into lines you didn’t even know you had.
Foundation is meant to be the canvas of your entire makeup look. When done right, it shouldn’t look like makeup at all—it should simply look like your skin on its absolute best day.
Whether you are a complete beginner or looking to refine your technique, this comprehensive guide breaks down everything you need to know about choosing, matching, and applying foundation like a professional makeup artist.
Part 1: Understanding Foundation Types & Formulations
Before you even think about matching your skin tone, you need to choose the right formula. The foundation type determines how the product sits on your skin, how long it lasts, and the level of coverage it provides.
       ┌────────────────────────────────────────────────────────┐
       │              CHOOSING YOUR FORMULA                     │
       └───────────────────────────┬────────────────────────────┘
                                   │
          ┌────────────────────────┼────────────────────────┐
          ▼                        ▼                        ▼
     LIQUID                   POWDER                   CREAM
  • Versatile             • Great for Oily         • High Coverage
  • Sheer to Full           Skin                   • Dewy Finish
  • Dry to Combo          • Lightweight            • Dry / Mature
1. Liquid Foundation
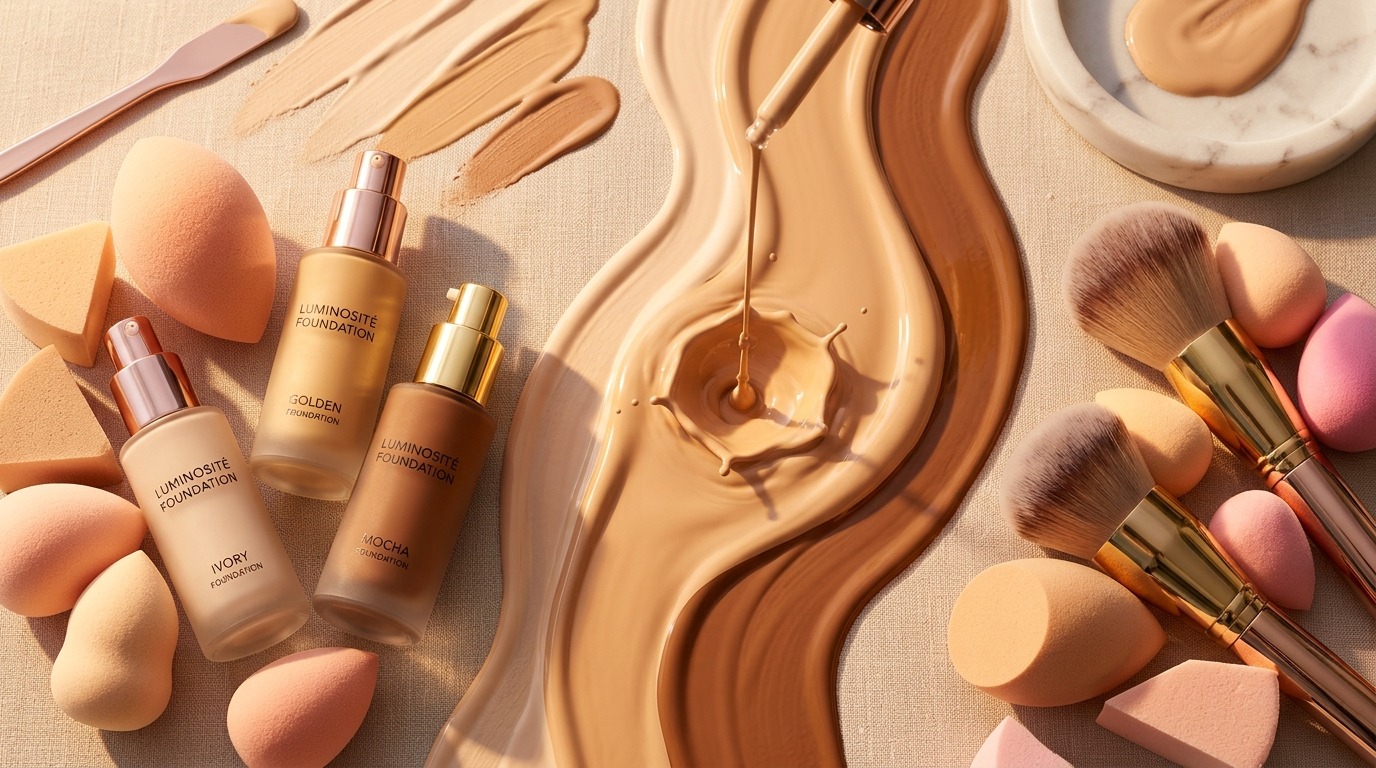
Liquid foundation is the undisputed king of the beauty world due to its versatility.
- Best For: Almost all skin types, depending on the specific oil-to-water ratio in the formula.
- Coverage: Ranges from sheer tint to full coverage.
- Finish: Available in matte, natural/satin, and dewy.
- Pro Tip: Water-based liquids work best for sensitive or acne-prones skin, while silicone-based liquids offer a smooth, pore-blurring effect that resists sweat and humidity.
2. Powder Foundation
Powder foundations come in pressed or loose form and are ideal for quick, low-maintenance routines.
- Best For: Oily, combination, or acne-prone skin.
- Coverage: Light to medium.
- Finish: Soft matte.
- Pro Tip: Avoid powder foundation if you have dry or mature skin, as the pigments can absorb moisture and cling to fine lines and dry patches.
3. Cream Foundation
Rich, pigmented, and highly hydrating, cream foundations are a staple in professional film and bridal makeup kits.
- Best For: Dry, dehydrated, or mature skin.
- Coverage: Medium to full coverage.
- Finish: Radiant, luminous, or satin.
- Pro Tip: A little goes a long way. Warm the product between your fingers or on the back of your hand before applying to help it melt seamlessly into the skin.
4. Tinted Moisturizers, BB & CC Creams
If you prefer a “no-makeup makeup” look, skin tints are your best friend.
- BB Creams (Blemish Balms): Focus on hydration and light coverage with skin-soothing benefits.
- CC Creams (Color Correctors): Formulated to neutralize redness, dullness, or dark spots.
- Tinted Moisturizers: Essentially a hydrating lotion with a touch of pigment.
- Best For: Normal to dry skin types seeking effortless, daily coverage.
Part 2: How to Match Your Shade and Undertone
The single biggest mistake people make with foundation is matching only the surface tone of their skin while ignoring the undertone.
Your skintone is the surface color of your skin (e.g., fair, light, medium, tan, deep), which can change depending on sun exposure. Your undertone is the subtle, muted shade underneath your skin’s surface—and it never changes.
| Undertone Category | Characteristics | Jewelry Test | Vein Appearance | Sun Reaction |
|---|---|---|---|---|
| Cool (C) | Pink, red, or bluish undertones | Silver looks best | Blue or purple veins | Burns easily, rarely tans |
| Warm (W) | Yellow, golden, or peachy undertones | Gold looks best | Greenish or olive veins | Tans easily, rarely burns |
| Neutral (N) | A balanced mix of warm and cool | Silver and gold both look great | Blue-green mix | Tans gradually, sometimes burns |
The Olive Factor
Some individuals have olive undertones, which feature a subtle green or grayish cast. If warm foundations look too yellow and cool foundations look too pink on you, you likely have an olive undertone. Look for brands that explicitly formulate olive shades or use a blue color-correcting mixer to adjust warm foundations.
The Swatch Test Strategy
Never test foundation on the back of your hand, your wrist, or your forehead—these areas rarely match the shade of your face and neck.
- Step 1: Select three shades that look close to your skin tone in natural light.
- Step 2: Apply a jawline swatch of each shade, extending down toward your neck.
- Step 3: Step into natural daylight (store lighting is notoriously deceptive).
- Step 4: The correct shade is the one that completely disappears into both your face and your neck.
Crucial Rule: Always match your foundation to your neck and chest, not just your face. Your face often holds more redness or hyperpigmentation than the rest of your body. Matching your chest ensures your overall tone looks cohesive.
Part 3: Skin Preparation—The Unsung Hero
Even the most expensive, top-tier foundation will look patchy or cakey if applied to unprepared skin. Skincare is 80% of a successful foundation application.
       ┌────────────────────────────────────────────────────────┐
       │             THE PRE-MAKEUP SKINCARE STEPS              │
       └───────────────────────────┬────────────────────────────┘
                                   │
      ┌────────────────────────────┼────────────────────────────┐
      ▼                            ▼                            ▼
  1. CLEANSE                   2. MOISTURIZE                3. PRIMER
  Remove dirt & oil          Hydrate for smooth base      Lock in base & blur
1. Cleanse & Exfoliate
Remove built-up oil, dirt, and dead skin cells. Gently exfoliate 2–3 times a week using a chemical exfoliant (like AHA or BHA) to clear dry flakes that foundation loves to stick to.
2. Hydrate & Moisturize
Apply a lightweight moisturizer suited to your skin type.
- Oily Skin: Opt for an oil-free gel moisturizer.
- Dry Skin: Choose a rich, lipid-replenishing cream.
- Wait Time: Allow your moisturizer to absorb for at least 3 to 5 minutes before applying primer or foundation.
3. Match Your Formulas (Silicone vs. Water)
This is a golden rule taught in beauty academies: Like attracts like.
- If your primer is silicone-based (look for ingredients ending in -cone, -siloxane, or -methicone), use a silicone-based foundation.
- If your primer is water-based, pair it with a water-based foundation.
- Mixing silicone and water bases often causes pilling—where the product balls up and rubs off your face.
Part 4: Application Tools & Techniques
How you apply your foundation determines the texture, coverage, and longevity of the finish.
+------------------+-----------------------+-----------------------------+
| TOOL             | BEST FOR              | FINISH                      |
+------------------+-----------------------+-----------------------------+
| Beauty Sponge    | Sheer-to-Medium       | Dewy, natural, airbrushed   |
| Buffing Brush    | Medium-to-Full        | High coverage, smooth       |
| Flat Paddle Brush| Liquid/Cream Layering | Precise, intense pigment    |
| Clean Fingers    | Tinted Moisturizers   | Skin-like, warm & blended   |
+------------------+-----------------------+-----------------------------+
Technique 1: The Damp Beauty Sponge
A wet makeup sponge absorbs excess product while depositing pigment onto the skin, preventing a heavy appearance.
- How to use: Soak the sponge completely in water, then squeeze out every drop of excess moisture using a clean towel.
- Motion: Dab and bounce the sponge across your skin. Never drag or swipe, as dragging creates streak marks and lifts your skincare underneath.
Technique 2: The Foundation Brush
Brushes offer maximum control and coverage.
- Buffing Brush (Dense, round bristles): Use light, circular buffing motions to work liquid or cream foundation seamlessly into the skin.
- Flat Paddle Brush: Ideal for placing product strategically before blending out with a damp sponge or buffing brush.
Technique 3: The Finger Method
The warmth of your hands melts creams and skin tints directly into the skin, making this technique ideal for quick, effortless daily routines.
- How to use: Press and gently blend from the center of your face outward.
Part 5: Step-by-Step Professional Application Protocol
Follow this simple step-by-step method to achieve a long-lasting, flawless base every time:
  ┌─────────────────┐     ┌─────────────────┐     ┌─────────────────┐
  │  1. CENTER OUT  │ ──► │  2. LAYER SLOW  │ ──► │  3. CONCEAL &   │
  │ Start middle of │     │ Build coverage  │     │   CORRECT       │
  │ face & spread   │     │ only where needed│    │ Spot treat late │
  └─────────────────┘     └─────────────────┘     └─────────────────┘
                                                           │
                                                           ▼
                          ┌─────────────────┐     ┌─────────────────┐
                          │  5. LOCK IN     │ ◄── │  4. SET LIGHTLY │
                          │ Setting spray   │     │ Micro-powder    │
                          │ for longevity   │     │ T-zone focus    │
                          └─────────────────┘     └─────────────────┘
- Dispense Product Wisely: Start with half a pump or a small pea-sized amount on the back of your hand. It is much easier to add more coverage than to remove excess product.
- Apply from the Center Outward: Focus product where most people hold redness and discoloration—around the nose, cheeks, and forehead center. Blend outward toward the hairline, jaw, and ears for a natural fade.
- Build in Thin Layers: Rather than applying a thick layer everywhere, build coverage strategically. Apply your first thin layer, step back, and evaluate where you actually need extra product.
- Spot Conceal Second: Apply foundation before concealer. Foundation covers most minor discoloration, allowing you to use far less concealer later.
- Set with Precision: Avoid baking your entire face unless you have extremely oily skin or are performing under stage lights. Instead, use a fluffy brush and translucent powder to set only oil-prone areas (T-zone, under eyes, and sides of the nose).
- Melt with Setting Spray: Finish with a hydrating or misting setting spray. This removes any powdery residue and melds all layers together into a single, cohesive, skin-like finish.
Troubleshooting Common Foundation Disasters
- Problem: Foundation looks patchy or clings to dry spots.
- Fix: You need chemical exfoliation and richer hydration. Press a drop of face oil over dry patches before applying makeup, or mix a drop of oil directly into your foundation.
- Problem: Foundation turns orange by mid-day (Oxidization).
- Fix: Oxidization happens when foundation pigments react with skin oils and oxygen. Switch to an oil-free formula, use a stabilizing primer, or choose a shade half a step lighter than your natural tone.
- Problem: Foundation separates on the skin.
- Fix: Check your product ingredients. You are likely mixing a silicone-based primer with a water-based foundation (or vice versa). Keep base formulas matched.
Final Thoughts
Mastering makeup foundation isn’t about hiding your skin; it’s about enhancing your natural features. By identifying your exact undertone, picking the right formula for your skin type, preparing your skin properly, and building coverage in light layers, you can achieve a flawless, comfortable finish that lasts all day.
Take the time to experiment with different tools and lighting—once you find your signature match and method, applying foundation will feel effortless.