The Ultimate Guide to Makeup Foundation: How to Choose, Match, and Apply Like a Pro
Foundation is the unsung hero of any makeup routine. When it’s done right, it goes completely unnoticed, leaving behind only the illusion of naturally flawless, even-toned skin. But when it’s done wrong? It can look cakey, mismatched, or mask-like, instantly undermining the rest of your makeuphttps://glowingcave.com/2026/07/15/the-complete-guide-to-makeup-step-by-step-application/ efforts.
Navigating the world of foundation can feel completely overwhelming. With thousands of shades, formulas, finishes, and coverage levels crowding the beauty aisles, finding your “holy grail” product requires a bit of foundational knowledge. Whether you are a complete beginner looking to build your first makeup kit or a seasoned enthusiast wanting to refine your base routine, this guide will walk you through exactly how to choose, match, and apply foundation like a professional makeup artist.
Liquid, powder, and cream foundation formulas. Source: pogrebkov / Getty Images
1. Understanding Foundation Types
Before you can pick a shade, you need to choose a formula. The right formula depends entirely on your skin type and how you want the makeup to feel on your face.
| Foundation Type | Best For | Description |
|---|---|---|
| Liquid Foundation | All skin types | The most versatile and popular option. Liquids can range from sheer tints to full-coverage pigments and are easily buildable. |
| Powder Foundation | Oily or acne-prone skin | Comes in pressed or loose forms. It absorbs excess oil and provides a matte finish, though it can settle into fine lines if skin is dry. |
| Cream Foundation | Dry or mature skin | Highly pigmented and incredibly moisturizing. Creams offer excellent coverage and leave a dewy, hydrated finish. |
| Stick Foundation | Normal to oily skin, travel | Solid cream formulas twisted up from a tube. They offer buildable, heavy coverage and are perfect for targeted concealing. |
| Serum Foundation | Dry or aging skin | A hybrid of skincare and makeup. Thin, fluid, and packed with active ingredients (like hyaluronic acid), offering a very natural look. |
| Cushion Foundation | Normal to dry skin | A liquid formula housed in a sponge compact. Popularized by K-beauty, it delivers a radiant, lightweight glow that is easy to touch up. |
2. Decoding Coverage and Finish
Once you know the texture you want, you need to decide on coverage (how much skin it hides) and finish (how the makeup reflects light).
Coverage Levels
- Sheer/Light: Evens out your skin tone but lets your natural features—like freckles, slight redness, or moles—shine through. This is essentially a “your skin but better” look.
- Medium: Covers most redness, minor blemishes, and unevenness. Medium coverage is highly versatile because you can sheer it out with a damp sponge or build it up in problem areas.
- Full: Completely opaque. Full coverage hides acne, hyperpigmentation, birthmarks, and scars. It creates a blank, uniform canvas.
Finishes
- Matte: Has no shine or shimmer. It absorbs light and keeps oil at bay, making it the go-to for oily skin types or those working under heavy studio lights.
- Dewy/Luminous: Reflects light, giving the skin a moist, glowing, youthful appearance. It’s ideal for dry or dull skin, but can look greasy on naturally oily complexions.
- Satin/Natural: The sweet spot in between. It mimics the natural texture of a healthy human face—neither bone-dry nor overly shiny.
3. How to Find Your Perfect Shade and Undertone
This is the step that trips people up the most. Finding a shade isn’t just about how light or dark your skin is (your overtone); it’s equally about the subtle hue beneath the surface of your skin (your undertone).
Identifying Your Undertone
Your overtone can change with the seasons and sun exposure, but your undertone never changes. There are three main undertones:
- Cool: Hints of pink, red, or blue.
- Warm: Hints of yellow, peach, or golden.
- Neutral: A balanced mix of both warm and cool hues.
The Vein Test: Look at the veins on the inside of your wrist in natural daylight. If they look blue or purple, you are likely cool-toned. If they look green or olive, you are warm-toned. If you can’t quite tell if they are blue or green, you are probably neutral.
The Jewelry Test: Does silver jewelry make your skin look more radiant? You likely lean cool. Does gold jewelryhttps://rawayat.com.pk/collections/new-arrivals?gad_source=1&gad_campaignid=22726124343&gbraid=0AAAAA_fqq-X7CgfU7KbNvkUoHJTcCfFz0&gclid=Cj0KCQjw39zSBhDhARIsANammDsWTc7QqdgwTIiRsx7yf-672pkDWqAYE3WCF-r7RqSKuSQ8ECHq7r8aAnBkEALw_wcB flatter you more? You likely lean warm. If you look great in both, you’re neutral.
The Sun Test: When you go out in the sun without protection, do you burn easily and turn red? You are probably cool. Do you tan easily and turn golden brown? You are likely warm.
Liquid foundation swatches across different shades. Source: Studio Peck LLC / Getty Images
Testing the Shade
Never test foundation on the back of your hand—your hand is almost always a different shade than your face. Instead, swatch three distinct shades that look close to your skin tone along your jawline.
Blend them slightly and step into natural sunlight. The shade that completely disappears into your neck and jaw without leaving a visible demarcation line is your perfect match. If a shade looks slightly ashy or grey, the undertone is wrong for you.
4. The Perfect Application Routine
Even the most expensive, perfectly matched foundation will look terrible if your skin isn’t prepped or if you apply it incorrectly.
1
Cleanse and Exfoliate
The canvas matters
1.Cleanse and Exfoliate:The canvas matters.
Foundation clings to dead skin cells and dry patches. Start with a freshly cleansed face, and gently exfoliate 1-2 times a week to ensure a smooth canvas.
2
Moisturize Heavily
2.Moisturize Heavily:
Even if you have oily skin, moisturizer is non-negotiable. Hydrated skin plumps up fine lines and prevents the foundation from absorbing your skin’s natural water content, which causes cakey makeup. Let the moisturizer sink in for at least 5 minutes.
3
Apply Primer
Match your primer base to your foundation base
3.Apply Primer:Match your primer base to your foundation base.
Primer creates a barrier between your skin and makeup, blurring pores and extending wear time. Crucial rule: If you use a water-based foundation, use a water-based primer. If you use a silicone-based foundation, use a silicone-based primer. Mixing water and silicone causes the foundation to pill and separate on the skin.
4
Distribute the Product
4.Distribute the Product:
Pump the foundation onto the back of your hand or a mixing palette. Using your finger, dot the product in the center of your face—on your cheeks, forehead, and chin. You always want the most coverage in the center of the face where redness usually occurs, fading outward toward the hairline.
5
Blend, Blend, Blend
Choose your tool wisely
5.Blend, Blend, Blend:Choose your tool wisely.
- Damp Sponge (Beauty Blender): Best for a flawless, airbrushed, natural finish. Use a bouncing (stippling) motion to press the product into the skin. Do not drag or wipe.
- Dense Brush: Best for full coverage. Buff the product in small, circular motions.
- Fingers: Great for sheer tints and serums, as the warmth of your hands melts the product into the skin.
6
Conceal
6.Conceal:
Apply concealer after foundation. Foundation will cover a lot of your blemishes naturally; applying concealer first usually results in wiping it away when you blend your foundation. Target only the stubborn dark circles or spots that remain.
7
Set It
7.Set It:
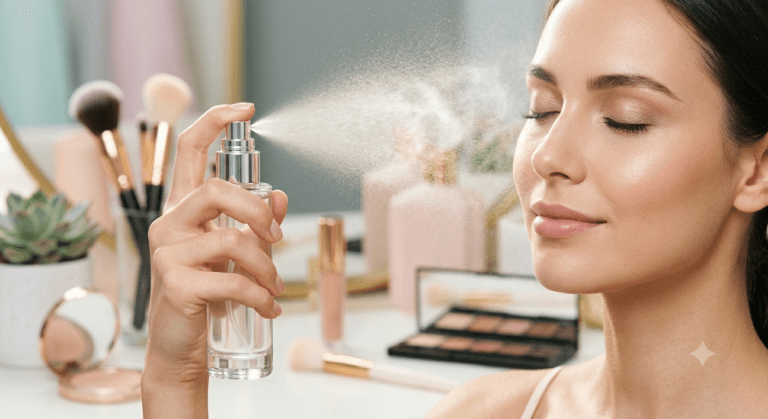
Lock your hard work in place. If you have dry skin, use a setting spray. If you have oily skin, lightly press a translucent setting powder into your T-zone (forehead, nose, chin) with a fluffy brush.
5. Common Foundation Mistakes to Avoid
Even with the best products and intentions, it is easy to make a few common errors. Here is what to watch out for:
- Using Too Much Product: Less is always more. You can always add an extra layer to areas that need it, but trying to blend out a thick, heavy layer of foundation all over your face almost guarantees a cakey finish.
- Ignoring the Neck: Your face and neck should belong to the same person. Always blend whatever product is left on your sponge or brush slightly down your jawline and onto your neck to ensure a seamless transition.
- Applying in Bad Lighting: Yellow bathroom lighting can trick your eyes. Always try to do your makeup near a window with natural daylight. If that isn’t possible, invest in a bright, white-light vanity mirror.
- Never Changing Shades: Your skin tone fluctuates throughout the year. The shade that matched you perfectly after a summer beach vacation will likely look like a dark, orange mask in the dead of winter. It is completely normal to own a “summer shade” and a “winter shade,” and mix them during the transitional spring and fall months.
Final Thoughts
Mastering foundation takes a little bit of trial, error, and patience, but understanding the chemistry of your skin and the physics of light reflection makes all the difference. Remember that makeup is entirely subjective. There are no actual laws—only guidelines. If you love a matte finish on your dry skin, or if you prefer to use your hands for a full-coverage cream, do what makes you feel the most confident and beautiful.
Take the time to assess your skin’s needs, identify your true undertones, and invest in proper prep. Once you nail down this fundamental skill, the rest of your makeup routine will elevate effortlessly.
Want to know how to identify if your products are water or silicone-based?Yes