The Secret to Salon-Quality Nails at Home: Why Everyone Is Obsessed with This Genius Technique
The Evolution of Fingertip Artistry: How to Master Modern Nail Design
For decades, painting one’s nails was a simple act of routine grooming—a quick coat of classic red or soft pink brushed on in a hurry before running out the door. Today, however, manicures have undergone a radical transformation. Nails are no longer just a backdrop for subtle color; they have evolved into canvas, accessory, and personal expression rolled into one.
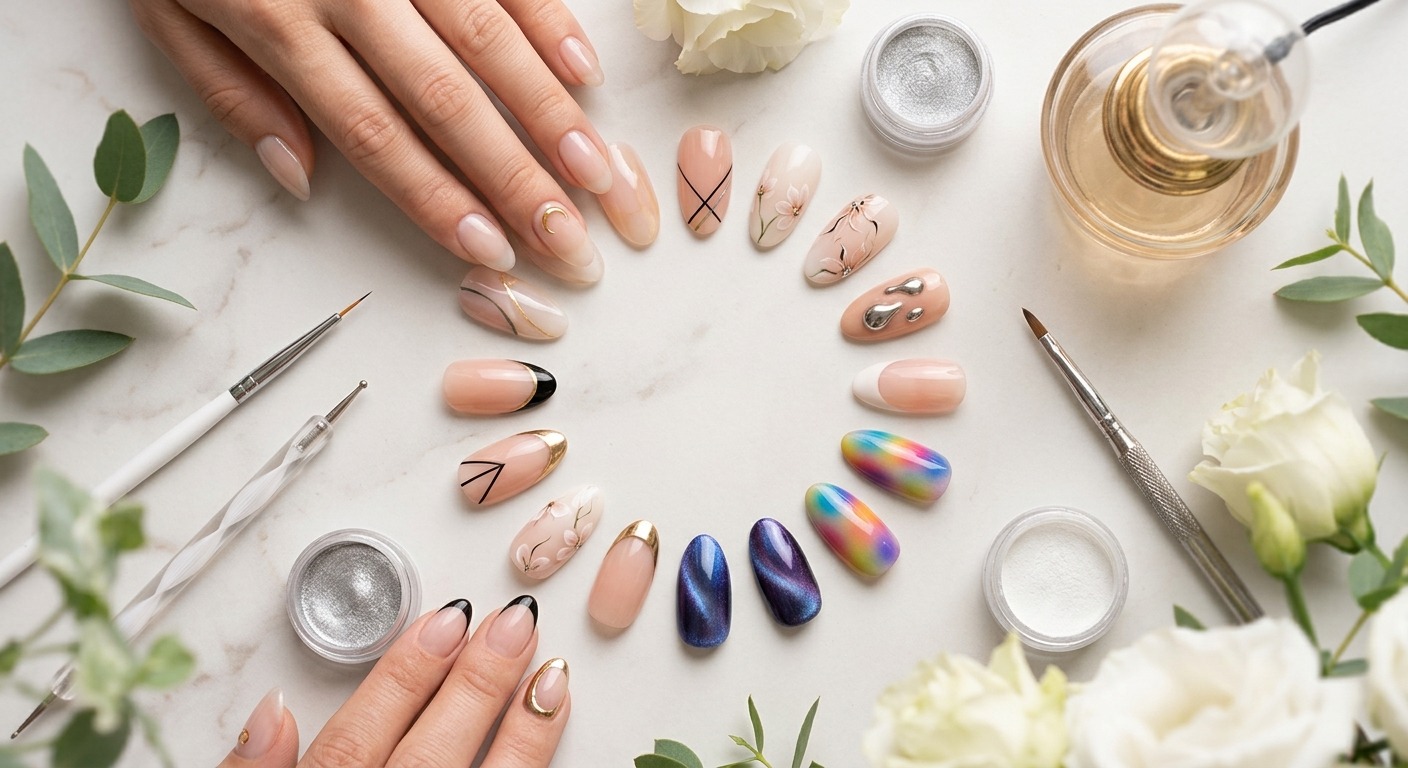
From the subtle elegance of sheer “soap nails” and ultra-fine micro French tips to the high-drama allure of liquid chrome, velvet magnetic effects, and 3D sculpted gel, modern nail art sits squarely at the intersection of beauty, fashion, and fine craftsmanship.
Whether you are a newcomer eager to step beyond basic polished nails or an experienced beauty enthusiast seeking to refine your technique, understanding the world of nail design opens up endless creative possibilities.
The Ultimate Preparation: Building a Flawless Canvas
Behind every mesmerizing nail design lies an invisible foundation: flawless nail prep. Attempting intricate line work or applying high-shine gel over unrefined nails is like painting a masterpiece on raw, uneven paper—it simply won’t last.
1. Shape and Symmetry
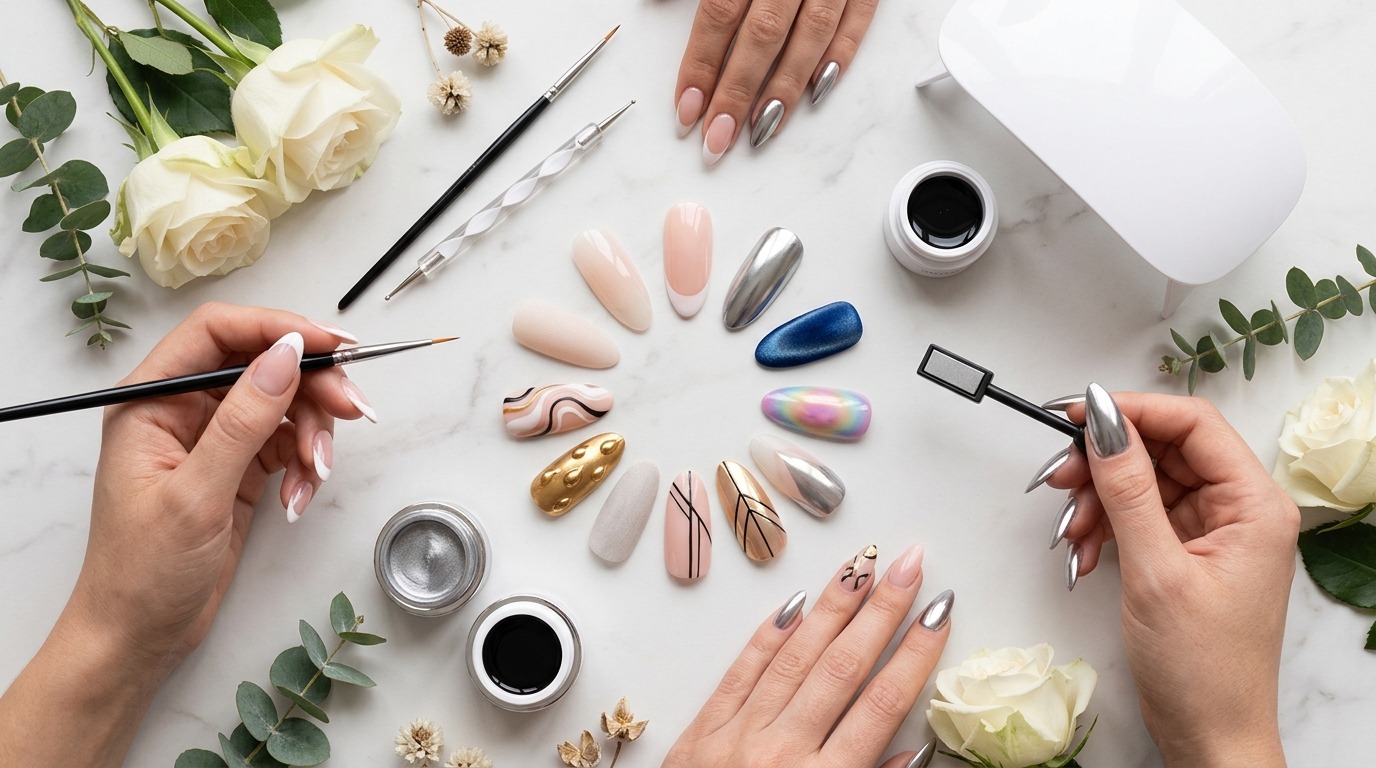
The foundation of great nail aesthetics begins with selecting a silhouette that complements your hand shape:
- Almond & Oval: These soft, tapered shapes elongate the fingers and serve as an ideal frame for soft gradients, aura effects, and delicate floral motifs.
- Square & Squoval: Featuring straight edges and slightly softened corners, these structural shapes provide a stable, wide canvas perfect for geometric patterns, bold stripes, and modern color-blocking.
- Coffin & Stiletto: Bold, dramatic, and edgy, these elongated styles are favored for maximalist designs, heavy gem embellishments, and detailed freehand illustration.
2. Cuticle Care and Surface Dehydration
For nail art to adhere properly—especially when working with long-wearing gel systems—the nail plate must be completely clean:
- Soften and gently push back the cuticles rather than cutting aggressively, which can cause micro-tears in the skin.
- Gently buff the shine off the natural nail with a fine-grit buffer block to create micro-texture for adhesion.
- Wipe the nail plate with a 90% isopropyl alcohol or specialized dehydrator solution to remove all residual oils, moisture, and dust particles.
The Essential Toolkit: From Beginner to Pro
You don’t need a full commercial studio to start crafting impressive designs at home, but having the right tools bridges the gap between amateur attempts and crisp, professional results.
| Tool | Primary Purpose | Ideal For… |
|---|---|---|
| Detail Liner Brushes | Ultra-thin, long synthetic bristles | Crisp geometric lines, French tip arcs, intricate freehand painting |
| Dotting Tools | Double-ended metal styluses with rounded tips | Perfect polka dots, quick flower petals, leopard print spots |
| Striping Tape | Adhesive metallic or paper strips | Masking off clean negative space, razor-sharp straight lines |
| Silicone Stamper & Plates | Etched metal designs transferred via soft silicone | Instant, ultra-complex patterns without freehand drawing |
| Magnetic Wands | Multi-directional magnets | Manipulating iron-powder particles in “cat-eye” and velvet gel polishes |
| Chrome Powders | Fine metallic resin pigments | High-shine mirror, iridescent pearl, and molten metal accents |
Core Techniques Every Nail Artist Must Master
Nail design can feel overwhelming due to the sheer variety of styles visible across social platforms. However, most complex sets are simply layerings of a few foundational techniques.
1. The Art of the Perfect Gradient (Ombré & Aura)
Seamless color transitions are a staple of modern manicures. The classic horizontal ombré fades one color into another from base to tip, while the trending “Aura” nail radiates color outward from the center like a glowing aura cloud.
- Sponge Technique (Regular Polish): Apply a latex barrier around the cuticle area. Dab two overlapping polish colors onto a damp cosmetic wedge sponge, then lightly bounce the sponge onto the nail plate in thin layers.
- Blooming Gel Technique (Gel Polish): Apply a thin coat of uncured clear “blooming gel.” Drop a dot of concentrated color into the center or along the edge, watching as the wet gel naturally disperses the pigment into a soft, hazy gradient before curing under an LED lamp.
Classic Ombré:   [Base Color] ===(Smoothed Fade)===> [Tip Color]
Aura Effect:     [Outer Base Ring] ===(Soft Glow Halo)===> [Vibrant Core Center]
2. High-Precision Freehand and Line Work
Creating razor-sharp lines requires technique rather than just a steady hand:
- Anchor Your Hands: Rest the heels of your palms together on a stable surface while painting to eliminate hand tremors.
- Control Paint Viscosity: Gel paint is preferred over standard polish for fine art because it doesn’t dry in the air, allowing you to rework lines until they are perfect before setting them under light.
- Pull, Don’t Push: Always pull your liner brush toward you across the nail rather than pushing the tip forward. Let the length of the bristles drag naturally to form straight, uniform strokes.
3. Chrome, Molten Metal, and 3D Sculpture
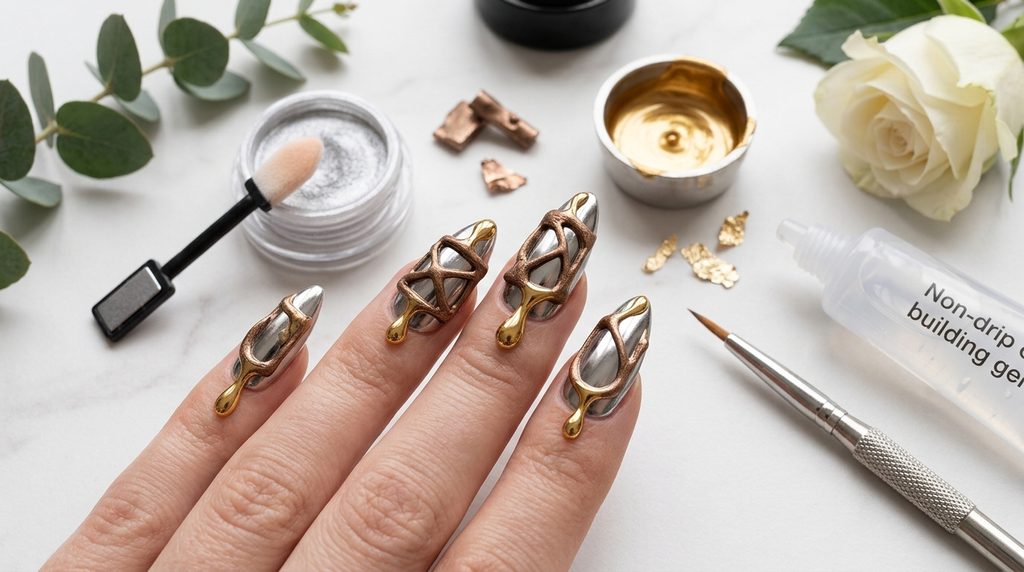
Textures add incredible dimension to flat manicures:
- Mirror Chrome: Apply a non-wipe gel topcoat and cure it to about 80% strength. Rub metallic chrome powder onto the surface using an eyeshadow applicator until a reflective mirror finish emerges. Seal thoroughly with a coat of builder gel before final topcoating to prevent peeling.
- 3D Gel Accents: Using a thick, non-drip “solid gel” or builder resin, swirl raised droplet shapes, liquid gold drops, or sweater-knit textures directly onto the nail surface before curing.
Trending Aesthetics Shaping the Industry
Current nail art balances two seemingly opposite ends of the spectrum: ultra-refined minimalism and maximalist tactile art.
The Clean Minimalist Movement
- Soap Nails & Sheer Glazes: Prioritizing healthy, impeccably groomed nails with a whisper-thin layer of milky pink or translucent white, finished with a glass-like shine.
- Micro French Tips: Reimagining the heavy, chalk-white French tip of the 1990s as a hairline stroke of color, chrome, or deep espresso along the very edge of the free margin.
- Negative Space: Leaving portions of the bare, prepped nail uncovered, using geometric blocks, soft swoops, or delicate dots to create balance.
The Texture and Depth Revolution
- Cat-Eye & Velvet Nails: Using fine magnetic iron filings suspended in translucent gel to reflect light, creating a dynamic surface that shifts with movement.
- Textile & Pattern Accents: Mimicking rich fabrics—such as tweed, plaid, or lace—by combining matte base coats with glossy embossed line work.
- Encapsulated Art: Embedding metallic foils, dried mini-botanicals, or glittering flakes under a thick layer of crystal-clear builder gel to create a 3D depth effect inside the nail itself.
Longevity and Care: Keeping Your Art Pristine
Creating stunning nail art requires time and effort, so protecting your work is crucial for long-lasting wear.
- Cap the Free Edge: Always run your topcoat brush horizontally across the very tip edge of the nail. Wrapping the tip seals the layers together and prevents moisture from creeping under the art, which causes premature lifting or chipping.
- Hydrate Daily: Apply high-quality cuticle oil rich in jojoba or vitamin E twice daily. Flexible, hydrated nails flex under impact without breaking, whereas dry, brittle nails tend to snap and crack the polish above them.
- Protect Your Hands: Treat your nails as jewelry, not tools. Wear rubber gloves when washing dishes or handling harsh cleaning chemicals to preserve the high-shine surface and prevent chemical breakdown of gel coats.
Endless Expression at Your Fingertips
Nail art is far more than a trend; it is an accessible, evolving form of personal sculpture and design. Whether you choose to wear a subtle, sheer manicure with a delicate gold detail or go all-out with multi-textured, magnetic artwork, the canvas is entirely yours to explore. Gather your tools, take your time with preparation, and let your hands tell your story.
Frequently Asked Questions (FAQs)
Q: How can I make my at-home nail art last longer without chipping?
A: To extend the life of your nail art, focus on thorough preparation and sealing:
- Dehydrate the nail: Wipe natural nails with isopropyl alcohol or acetone to remove surface oils before applying polish.
- Cap the free edge: Always sweep your base, color, and topcoat horizontally along the top edge/tip of the nail to seal the layers.
- Hydrate daily: Apply cuticle oil twice a day; moisturized nails flex under pressure, preventing polish from cracking.
Q: What is the difference between nail polish and gel polish for nail art?
A: Regular nail polish air-dries and is ideal for quick changes, but it can dry mid-stroke during detailed linework. Gel polish cures only under a UV/LED lamp, giving you infinite time to blend gradients, clean up mistakes, and draw precise details before setting it in place.
Q: Do I need a steady hand to do intricate nail designs?
A: No! Precision comes down to ergonomics and tools, not raw hand stability:
- Anchor your hands: Press the heels of your palms together on a table to eliminate tremors.
- Use long liner brushes: Long synthetic bristles drag naturally across the nail, creating straight lines for you.
- Leverage cheat tools: Use dotting tools, striping tape, or silicone stampers for flawless patterns without freehand painting.
Q: How do you safely remove gel nail art at home without damaging natural nails?
A: Never peel or pick off gel, as it strips the top layer of your natural nail. To remove safely:
- Gently file away the shiny topcoat layer to break the seal.
- Soak cotton bits in 100% pure acetone, place them on the nails, and wrap tightly in aluminum foil for 10–15 minutes.
- Gently slide off the softened gel using a wooden cuticle stick. Apply cuticle oil immediately after.
Q: What tools are best for nail art beginners?
A: Beginners only need four low-cost essentials to start creating professional-looking designs:
- A fine-line detail brush for line work.
- A double-ended dotting tool for polka dots and simple flowers.
- Cosmetic wedge sponges for smooth ombré and aura gradients.
- An acetone clean-up brush to wipe away mistakes around the cuticles before setting.